Making Ribbon Rose Wreath Ideas - Tutorial!
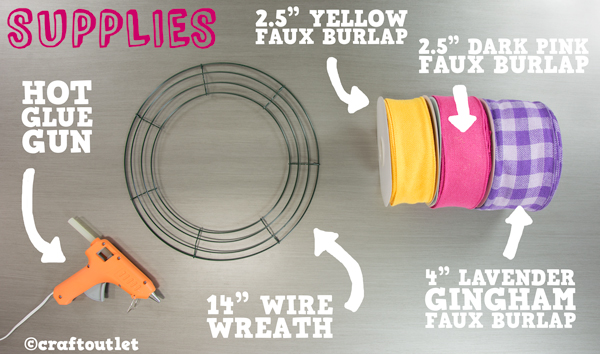
Supplies
You can buy all of the supplies in one easy step using our Wreath Recipe here.
- 2.5″ Dark Pink Faux Burlap
- 2.5″ Yellow Faux Burlap
- 4″ Lavender Gingham Faux Burlap
- 14″ Box Wreath Form
Other Supplies You’ll Need:
- Hot Glue Gun
- Scissors
- Ruler or Yardstick
Begin with the back of the wreath form facing up. Slide the gingham ribbon underneath the form and hot glue the end of the ribbon over the inner rung. Once cool, wrap the gingham ribbon evenly around the wreath, making sure to leave none of the wreath form exposed. 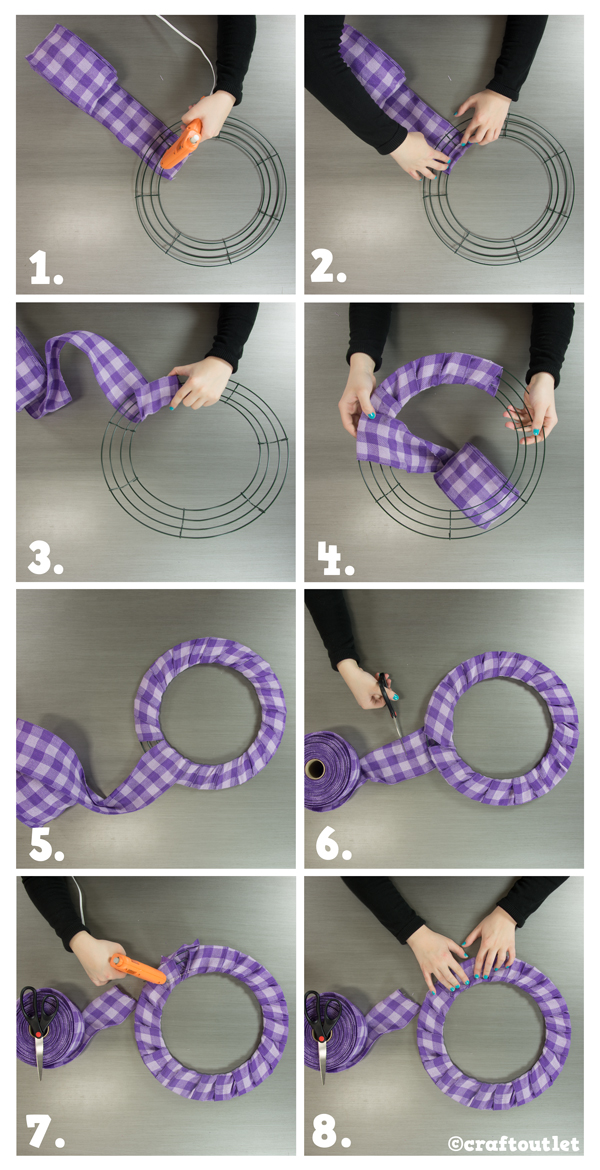
When the entire wreath form is wrapped, cut the last of the ribbon 2″ away from the form, leaving a tail. Hot glue this end onto the backside of the form. Let cool.
Next you’re going to make the rosettes. Watch the video below for an easy to follow visual demonstration of how to craft the perfect rosette in three sizes.
- Small Rose (1.5″ Finished) uses about 8″ of Ribbon
- Medium Rose (2.5″ Finished) Uses about 16″ of Ribbon
- Large Rose (3.5″ Finished) Uses about 32″ of Ribbon

For our next step, it’s helpful to begin with a cache of rosettes made in every size and color. This will come in handy once you begin to place them onto the wreath form as you want to maintain a great variety of size and color on your wreath.

To attach the roses, simply dab some hot glue on the back and place wherever you see fit on the wreath.

Glue the roses in clusters, trying to vary the sizes and colors as much as possible. If hot gluing first seems intimidating, you can always pin each rosette to get a preview of what your finished product will look like. Once happy, remove pins one rosette at a time and hot glue the rosette for a permanent placement.
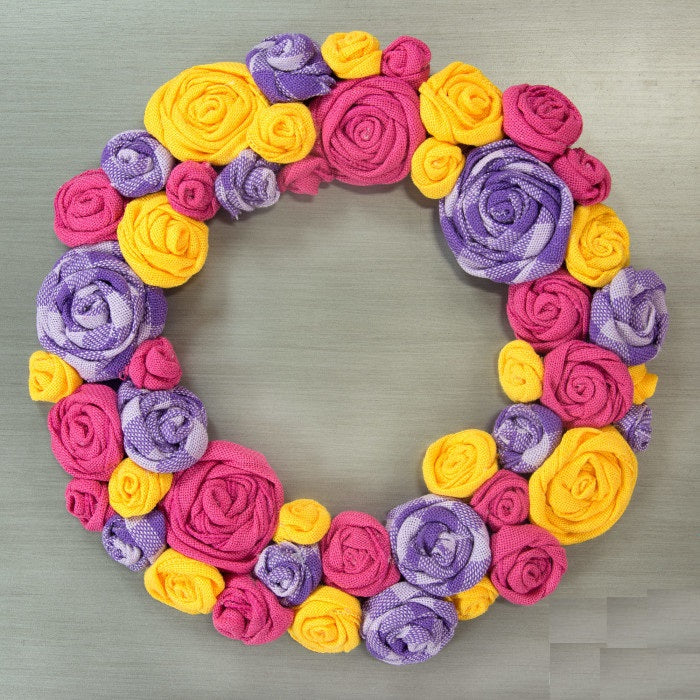
Now completed, your Ribbon Rose Wreath is ready to be shown off. If you’re wanting to choose your own ribbons for this technique, we suggest faux burlap ribbons. It has a large selection of color and printed faux burlap to help make finding the right ribbon to suit your taste easy. Keep in mind, the wider the ribbon is, the thicker the rose will be. We love this wreath as is, but don’t be afraid to add any spring accent pieces you like!


